

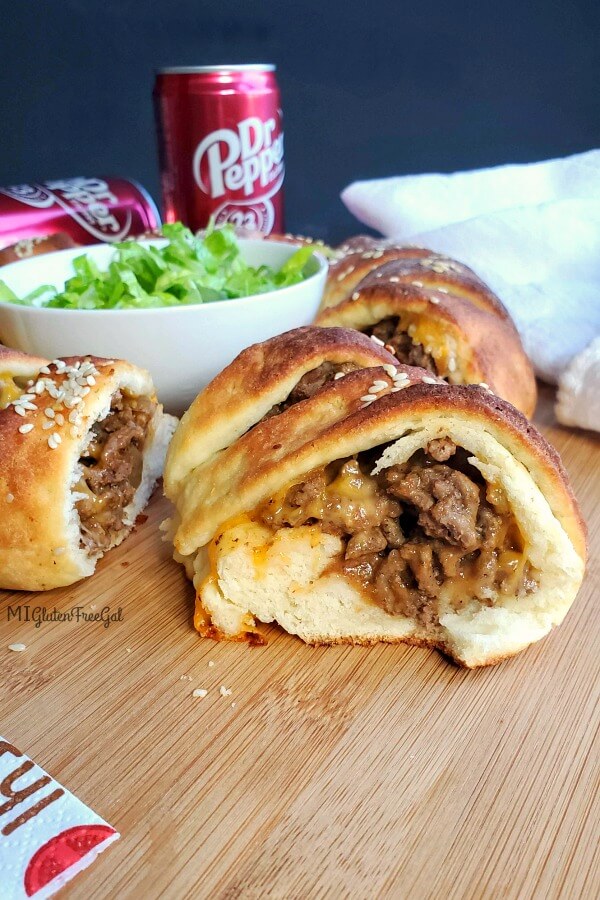
This gluten free cheeseburger crescent ring works great for a family meal, or a friendly gathering. Loaded with meat and cheese, this handheld meal will please just about everyone!
Gluten Free Crescent Dough
This gluten free cheeseburger crescent ring starts with my base recipe for gluten free crescent rolls. Quite a few recipes on my site begin with this dough. It all started with my Easter Resurrection rolls. Recently I used them to make apple dumplings, and then pigs in a blanket. Working on a recipe for turning them into cinnamon rolls, too!
As Ive mentioned in other posts, this dough works best with Cup 4 Cup flour. This brand of flour contains milk powder. Need a gluten free and dairy free recipe? Please try Petite Allergy Eats recipe for Gluten Free Vegan Garlic Crescent Rolls. (Minus the garlic, obvs.)
Recreating Pillsbury Recipes
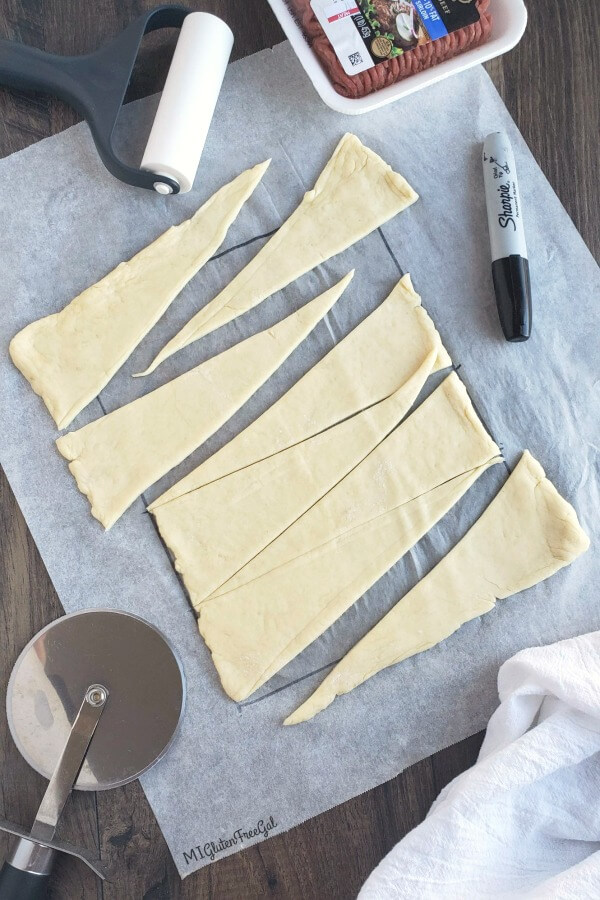
I recently contacted Pillsbury about the dimensions of their wheat based crescent rolls. The incredibly helpful staff stated that their 8 oz tube of dough, unrolled, measures 7.5 x 10.5 inches. (This equals an area of 78.75 total inches.) Therefore, I drew an 8 x 10 inch rectangle on the underside of my parchment as a guide. (If you use Reynolds Parchment Paper, grid lines are already printed on the paper.)
A side note that my finished gluten free crescent dough weighs 1 lb and 1 oz. This equates to one more ounce of dough than Pillsbury. Therefore, these crescent triangles will be just a smidge thicker. I marked my paper off in four 2 in. sections. Then I cut each of those 2 inch sections on a diagonal, to achieve 8 triangles of dough.

Building a Crescent Ring
The first time I made a dish like this, I made the Pillsbury Taco Crescent Ring. I dont know about you, but Im a visual learner. Therefore, I was glad that post also had a video. I 100% confess that I watched it more than once, and stopped it so I could understand how the pieces laid down on top of each other.
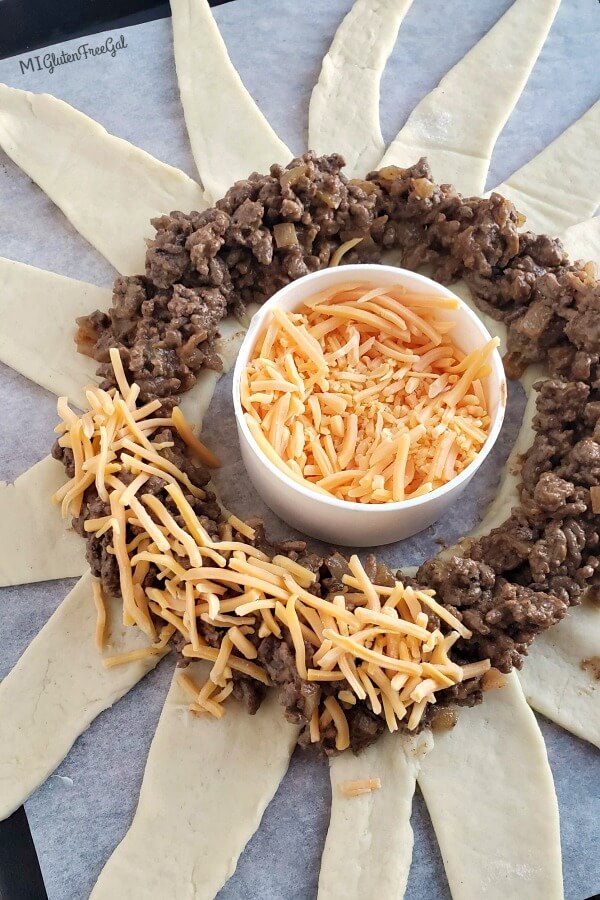
Basically, the wider parts of your triangle will overlap, in the center of the ring. Personally, after laying them in a circle, I pressed down on the inner triangles to seal them together. From there, you simply place your filling in a ring along that edge. (See picture below.)
Other Filling Options
This gluten free cheeseburger crescent ring is filled with beef, onions and sauce. I used ketchup and mustard as the sauce. However, you could substitute various other fillings to achieve other taste sensations.
- Seasoned Taco Meat
- Shredded chicken and Barbecue Sauce
- Italian Sausage and Pizza Sauce
- Tangy Lentil Sloppy Joe filling for a vegetarian option
- Bacon, Egg and Cheese
- and any other combinations you can think of!
Simply remember that my batch of dough equals two tubes of Pillsbury dough. Then get creative! Looking for a grain free version? Try this Taco Roll from My Table of Three.
Sesame Seeds Ninth Allergen?
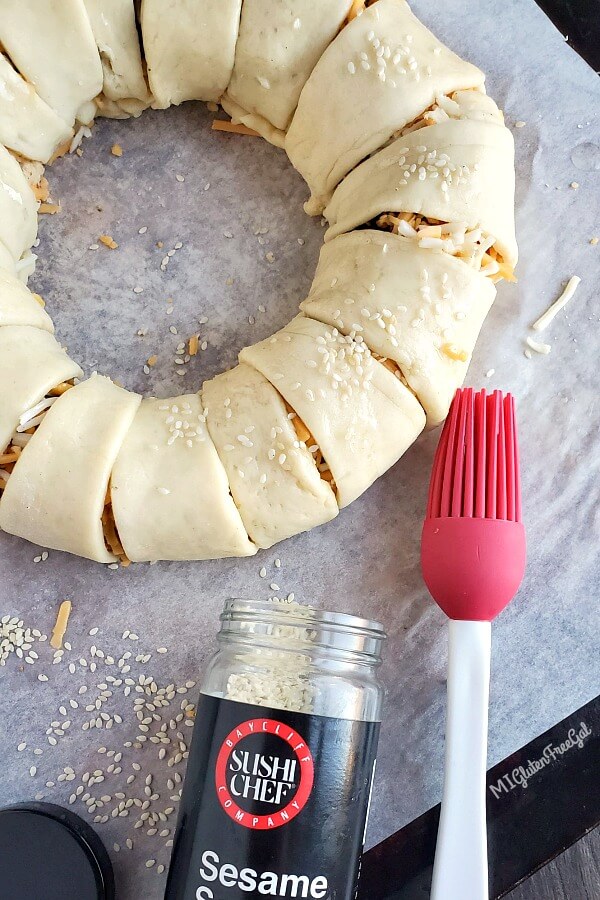
Some suggest coating this gluten free cheeseburger crescent ring with sesame seeds. I chose to do so. However, please be aware that sesame allergy is a very real thing. So real in fact, that the FDA is considering adding it to the current list of top 8 allergens. It is already required labeling in the UK and Canada.
Whether you choose to add them or not, I suggest brushing the top of your cheeseburger crescent ring with either oil or melted butter. Each time Ive made this the top of the crescent rings gets pretty toasty. While I havent tried it, you may want to consider covering the top of the ring with foil after 15 minutes of baking. Only to prevent over browning.
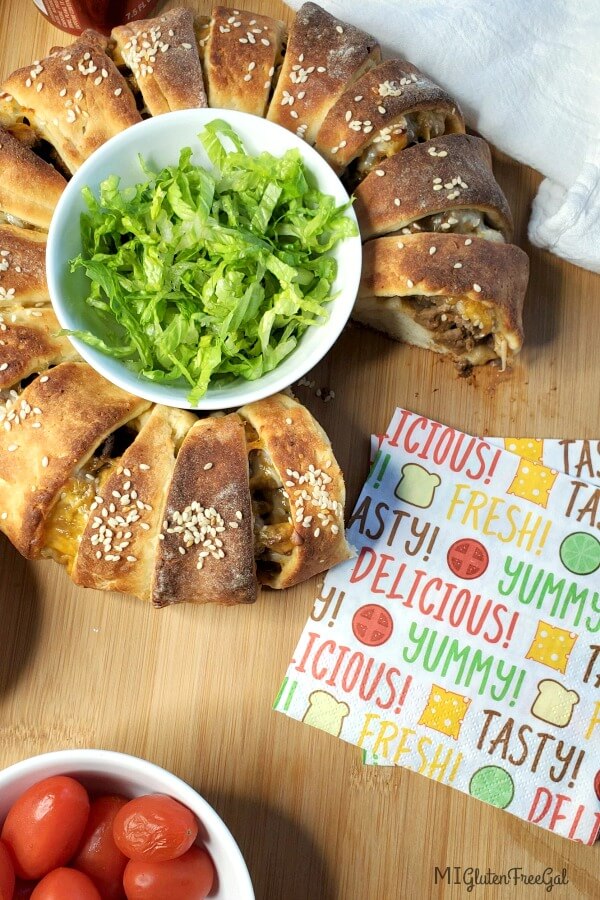
How to Top Your Gluten Free Cheeseburger Crescent Ring
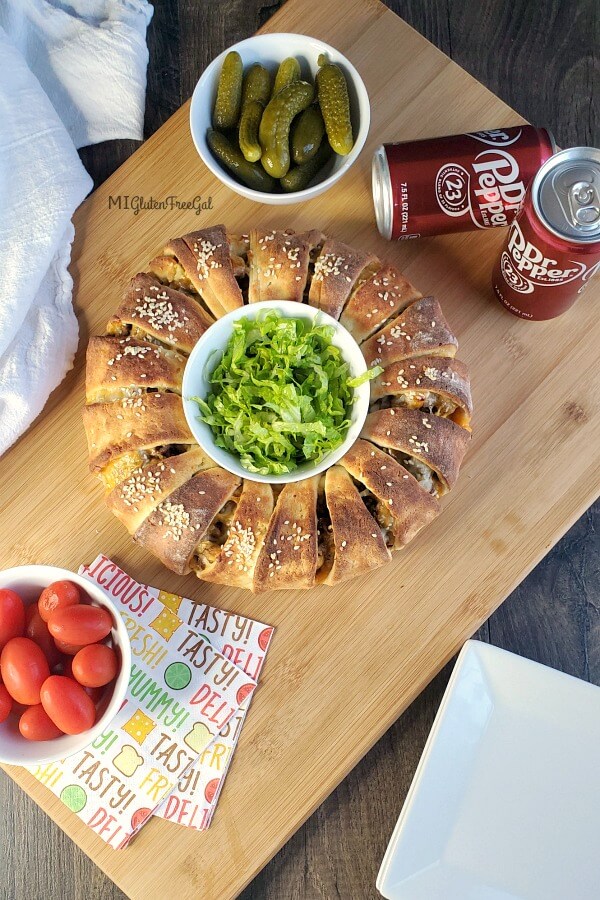
Once your gluten free cheeseburger crescent ring is done baking, now comes the fun part. Eating! That center hole in the middle is perfect for all sorts of dips for your crescent ring. I think this Homemade Thousand Island Dressing from Simpy Whisked would pair with it perfectly.
Want to take it up a notch? Make a batch of this Homemade Buffalo Sauce from Veggie Balance. Even though we dont eat pork, this Easy Skillet Bacon Jam from the Tablespoon website would be A. MA. ZING. Of course, simple pickle relish would be good. Id definitely keep extra ketchup and mustard on hand for a quick drizzle, too.
What to Serve with a Cheeseburger Crescent Ring
To be honest, this is where I struggle. When considering the food groups, this meal covers grains, meat and dairy all in one go. Therefore, I suggest serving it with vegetables and fruit. These Easy and Tasty Roasted Carrot Fries from The Pretty Bee are a perfect lower carb version to French Fries!
Make a simple salad, or this fancy Caramelized Brussels Sprout Salad from Half Baked Harvest. Add some fruit, and the Best Fruit Dip Ever from Allergylicious. (Dairy free and nut free, too!) Of course, cookies always pair perfectly with any handheld meal. My Gluten Free Cherry Chocolate Chunk Cookies go great with everything!
Other Gluten Free Appetizers
As I write this, its December 23rd, 2019. New Years and the Super Bowl are just around the corner. This gluten free cheeseburger crescent ring would be fantastic served at either gathering. If youre looking for more hand held eats, check out this post of 45 Gluten Free Super Bowl Party Appetizers from Celiac Mama.
Looking to wash this down with a cold beer? Check out the gluten free beer review on my site.
 Save Recipe
Ingredients
- 1 pkg active yeast
- 6 tbsp warm water (105-110 degrees)
- 4 tbsp sugar, divided
- 1 3/4 cup Gluten Free Flour (I used 244 grams of Cup 4 Cup brand)
- 1/4 c. butter, softened, cut into small pieces
- 1 egg
- 1/2 tsp salt
- 1 lb ground beef
- 1 small onion, diced
- 1/4 cup ketchup
- 3 tbsp mustard
- 1/2 - 1 tsp of salt
- 1 cup shredded cheese
- melted butter or oil for brushing dough
- sesame seeds for garnish (optional)
Instructions
- Preheat the oven to 200 degrees. (We are warming the oven to create an environment for proofing the dough. You will turn it off prior to putting the dough ball in the oven.)
- To begin, proof your yeast. I use a glass 2 cup measuring cup to do this. Mix the yeast and 1 tbsp sugar together. To that, add your warm water and allow to proof for 5-10 minutes. It should easily double in size, if not more.
- Meanwhile, in a stand mixer, combine the flour and chunks of softened butter. Using the paddle attachment, mix the flour and butter together. Do so until it all the butter is incorporated without large chunks. Transfer to a large glass bowl and set aside.
- In the stand mixer, combine the egg, salt, 3 tbsp sugar and proofed yeast. Turn stand mixer on low, and allow to run until all ingredients are mixed together.
- Slowly add the flour + butter mixture until a soft dough forms. Use a rubber scraper to make sure all bits of flour are incorporated.
- TURN OVEN OFF.
- Transfer ball of dough to the large glass bowl you previously used for the flour. Cover with a dry towel and place in warm, but turned off, oven. Allow to rest and rise for 60 minutes.
- While dough is proofing, dice onion and saute in an oiled skillet for 5 minutes until almost transparent. Add one pound of ground beef. Cook until no red remains. Once meat is cooked, add in ketchup, mustard, and salt. Stir and set aside.
- After the dough has risen, remove dough from oven and place on lightly floured parchment paper. (I find it helpful to draw an 8 x 10 rectangle on the underside of the parchment to use as a guide. Mark off 2 inch guide lines along the top and bottom of the rectangle.)
- Separate ball of dough into two equal 8.5 oz sections. Roll one portion of dough into an 8 x 10 rectangle. Cut into 4 equal sections, from top to bottom. Then, cut the 2 inch rectangles into triangles, by cutting along the diagonal. Then, repeat with the second portion of dough. (See photos above.)
- Preheat oven to 350 degrees.
- Line a cookie sheet with a new piece of parchment paper. Arrange dough triangles in a circle, with the wide end of the triangle facing inwards. (See photo above.)
- Spoon meat mixture around the inner edge of the circle created by the overlapping dough. Sprinkle shredded cheese (I recommend cheddar) on top of meat mixture.
- To form the final ring, take the outer points of the crescent dough and pull over the meat mixture. Tuck the outer tip of the triangle underneath the bottom crescent base. (Watch the video for the taco crescent ring, linked in the top of my post, for a better visual. It's kind of hard to explain in words.) Repeat with all the triangle points until all the meat mixture is covered with dough.
- Brush melted butter or olive oil over dough, and sprinkle with sesame seeds, if desired. (After I garnished mine, I gently pushed the crescent ring into a smaller and tighter circle.)
- Bake in a 350 degree preheated oven for 20-25 minutes, turning the cookie sheet 180 degrees halfway through baking. You may want to place tinfoil over the top of the crescent ring halfway through baking, to prevent over browning of the dough.
- Serve warm.
**This post is not sponsored by any brand. All thoughts and opinions are my own. However, this post does contain affiliate links. Purchases made through those links, or the Amazon search bar above, help support this blog with no extra expense to you. Thank you for your continued support!**
The post Gluten Free Cheeseburger Crescent Ring appeared first on MI Gluten Free Gal.