

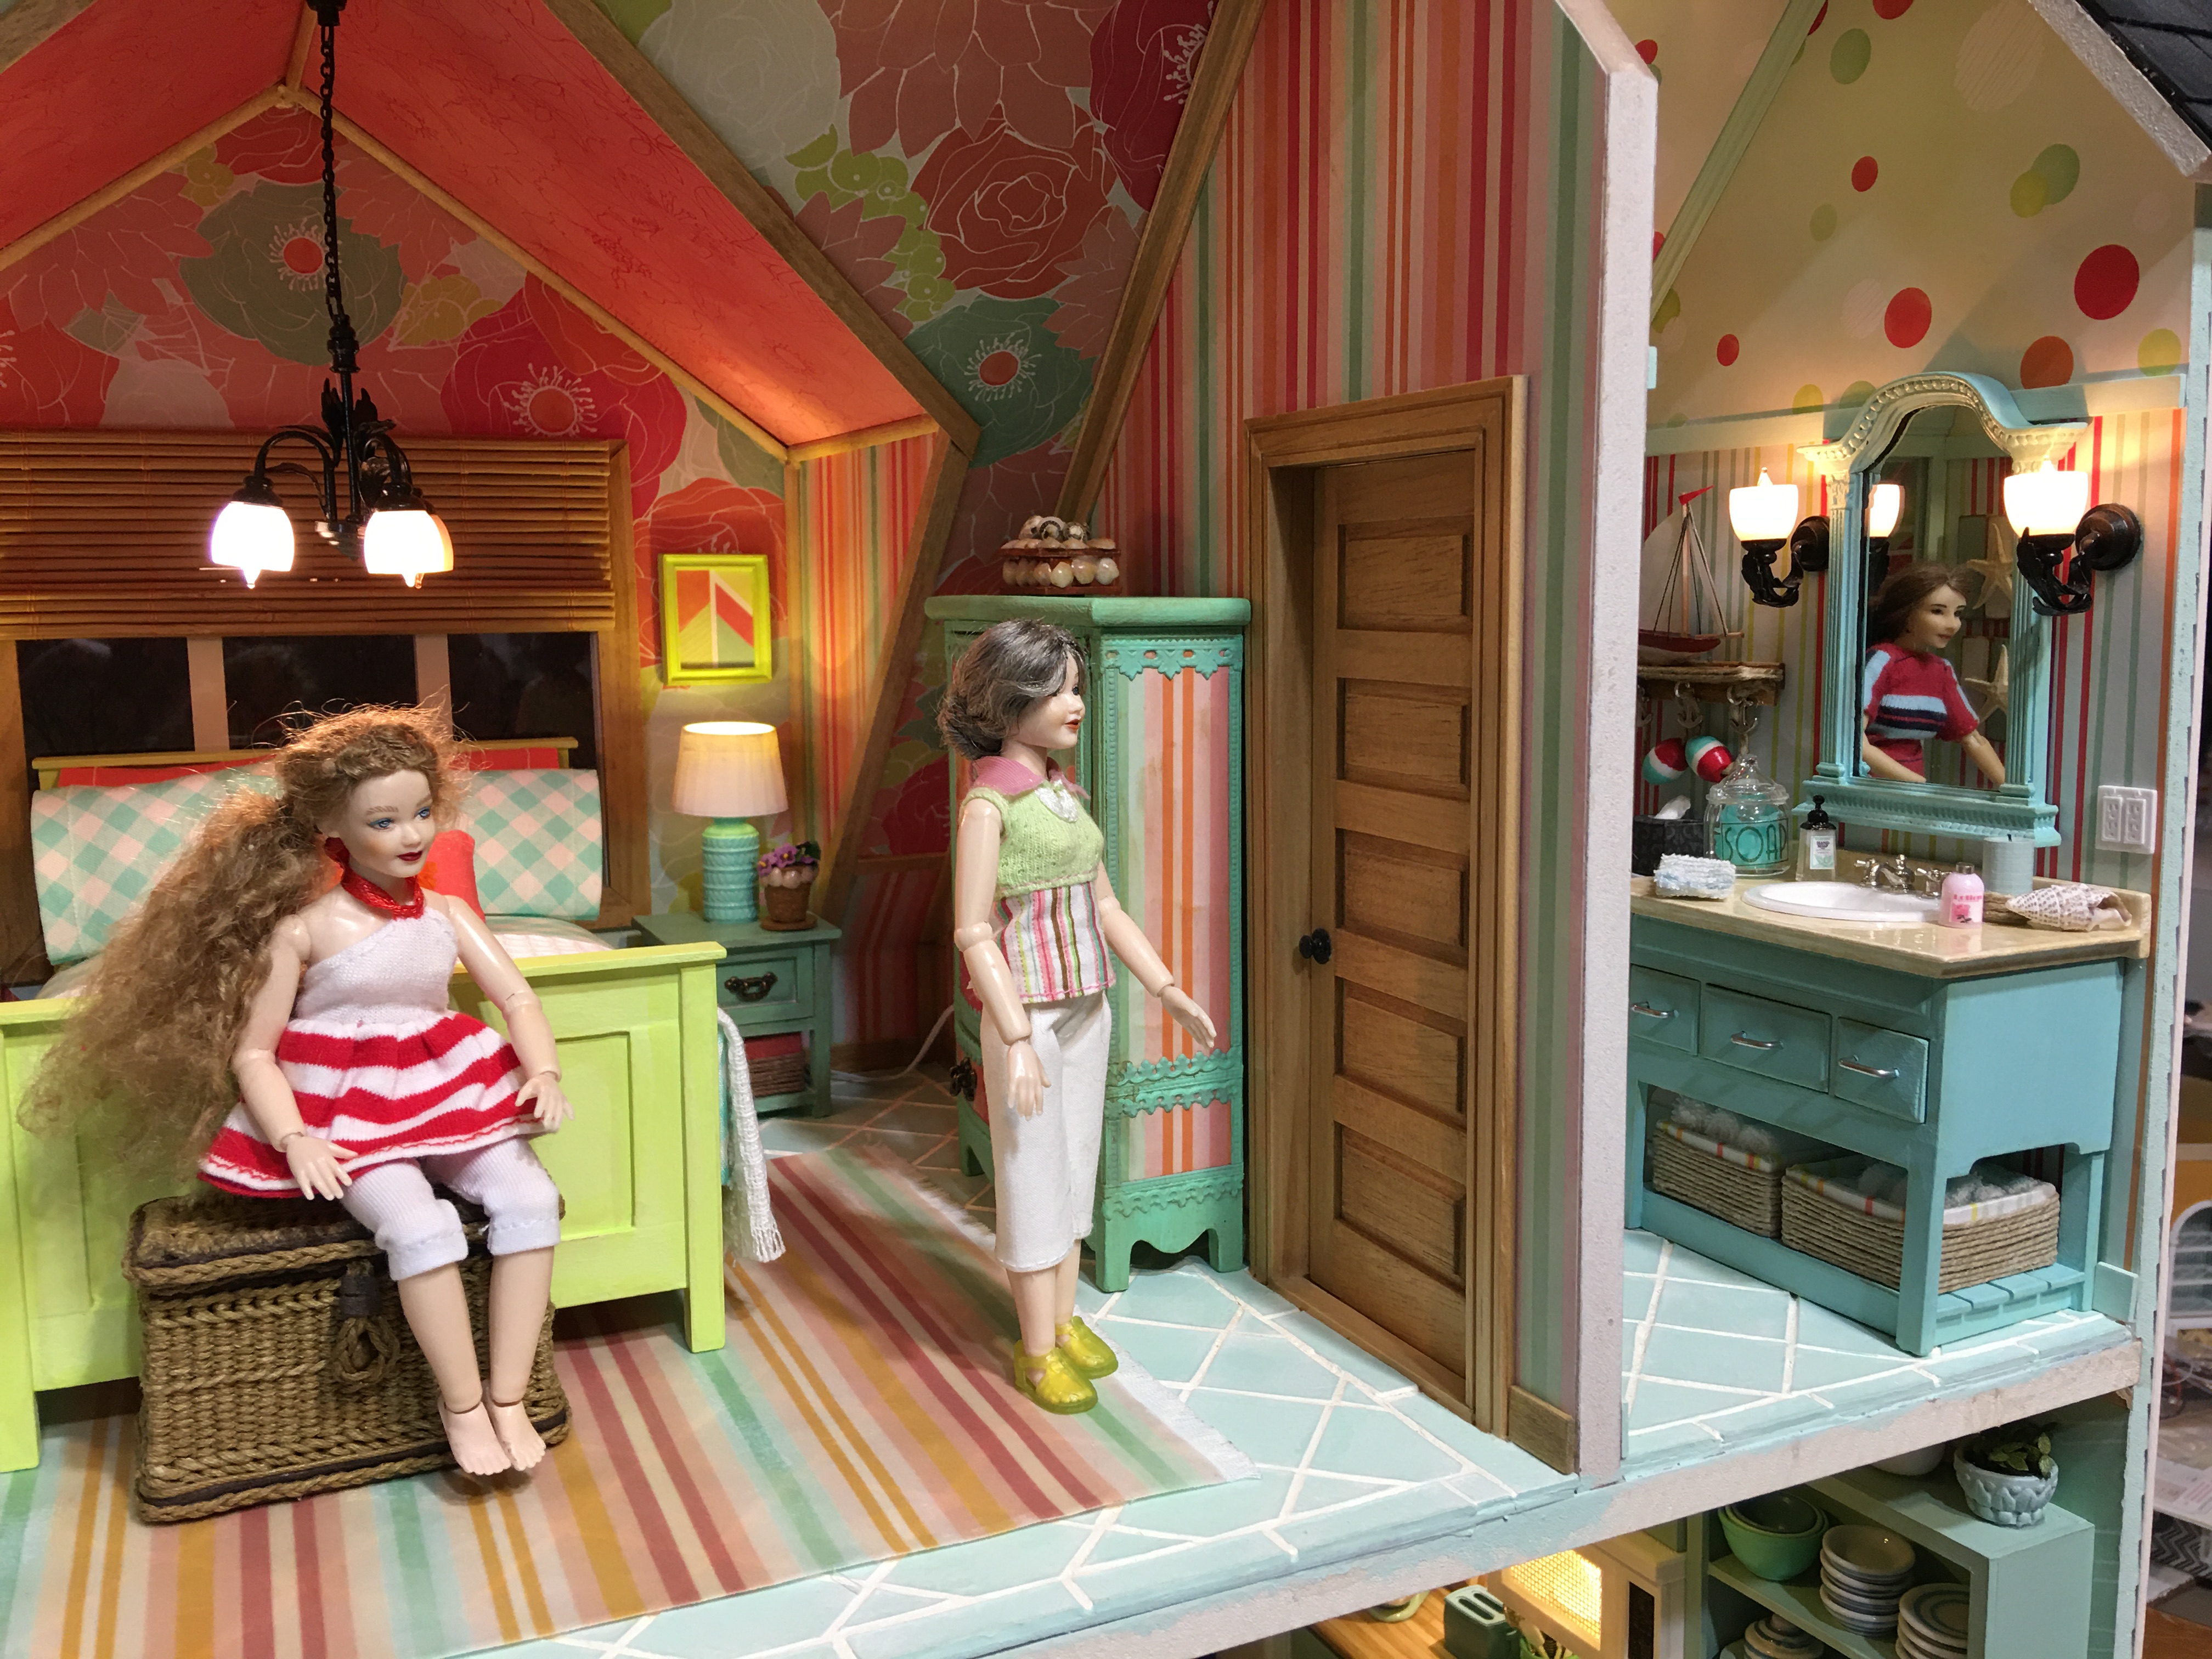
Roxanne came by recently to see the progress on the bungalow. She was very disappointed when she realized that neither of the bathrooms were completed. You see, she had to go! I realized then that I better quit procrastinating and get these bathrooms done right away! The ensuite upstairs next to the bedroom was going to be the fastest to get done, so in the interest of helping Roxanne, I got to it ~Q~U~I~C~K~!

You'll remember that before I moved on to the kitchen I had already installed the lighting, wallpaper, shower, floor tiles and made up the vanity. So it looked like this. That post was called Beachside Bungalow Bathroom.

Before I could pick up where I left off, I had to address that pesky bathroom light bulb that would not stay on. There was nothing to it but unscrewing the shade, unscrewing the bulb, scraping off a little crusty debris from the threads (it was an old Heidi Ott fixture I bought in a lot on eBay a couple years ago) and then screwing it back in. Now the light is steady and reliable! It's such a relief when a repair is that simple!

I installed the john first and Roxanne got to christen it. She said it worked just dandy, and she was hugely relieved! It might be just a little tall, though. It is from this Houseworks resin set. It might be just perfect when the girls are wearing heels.

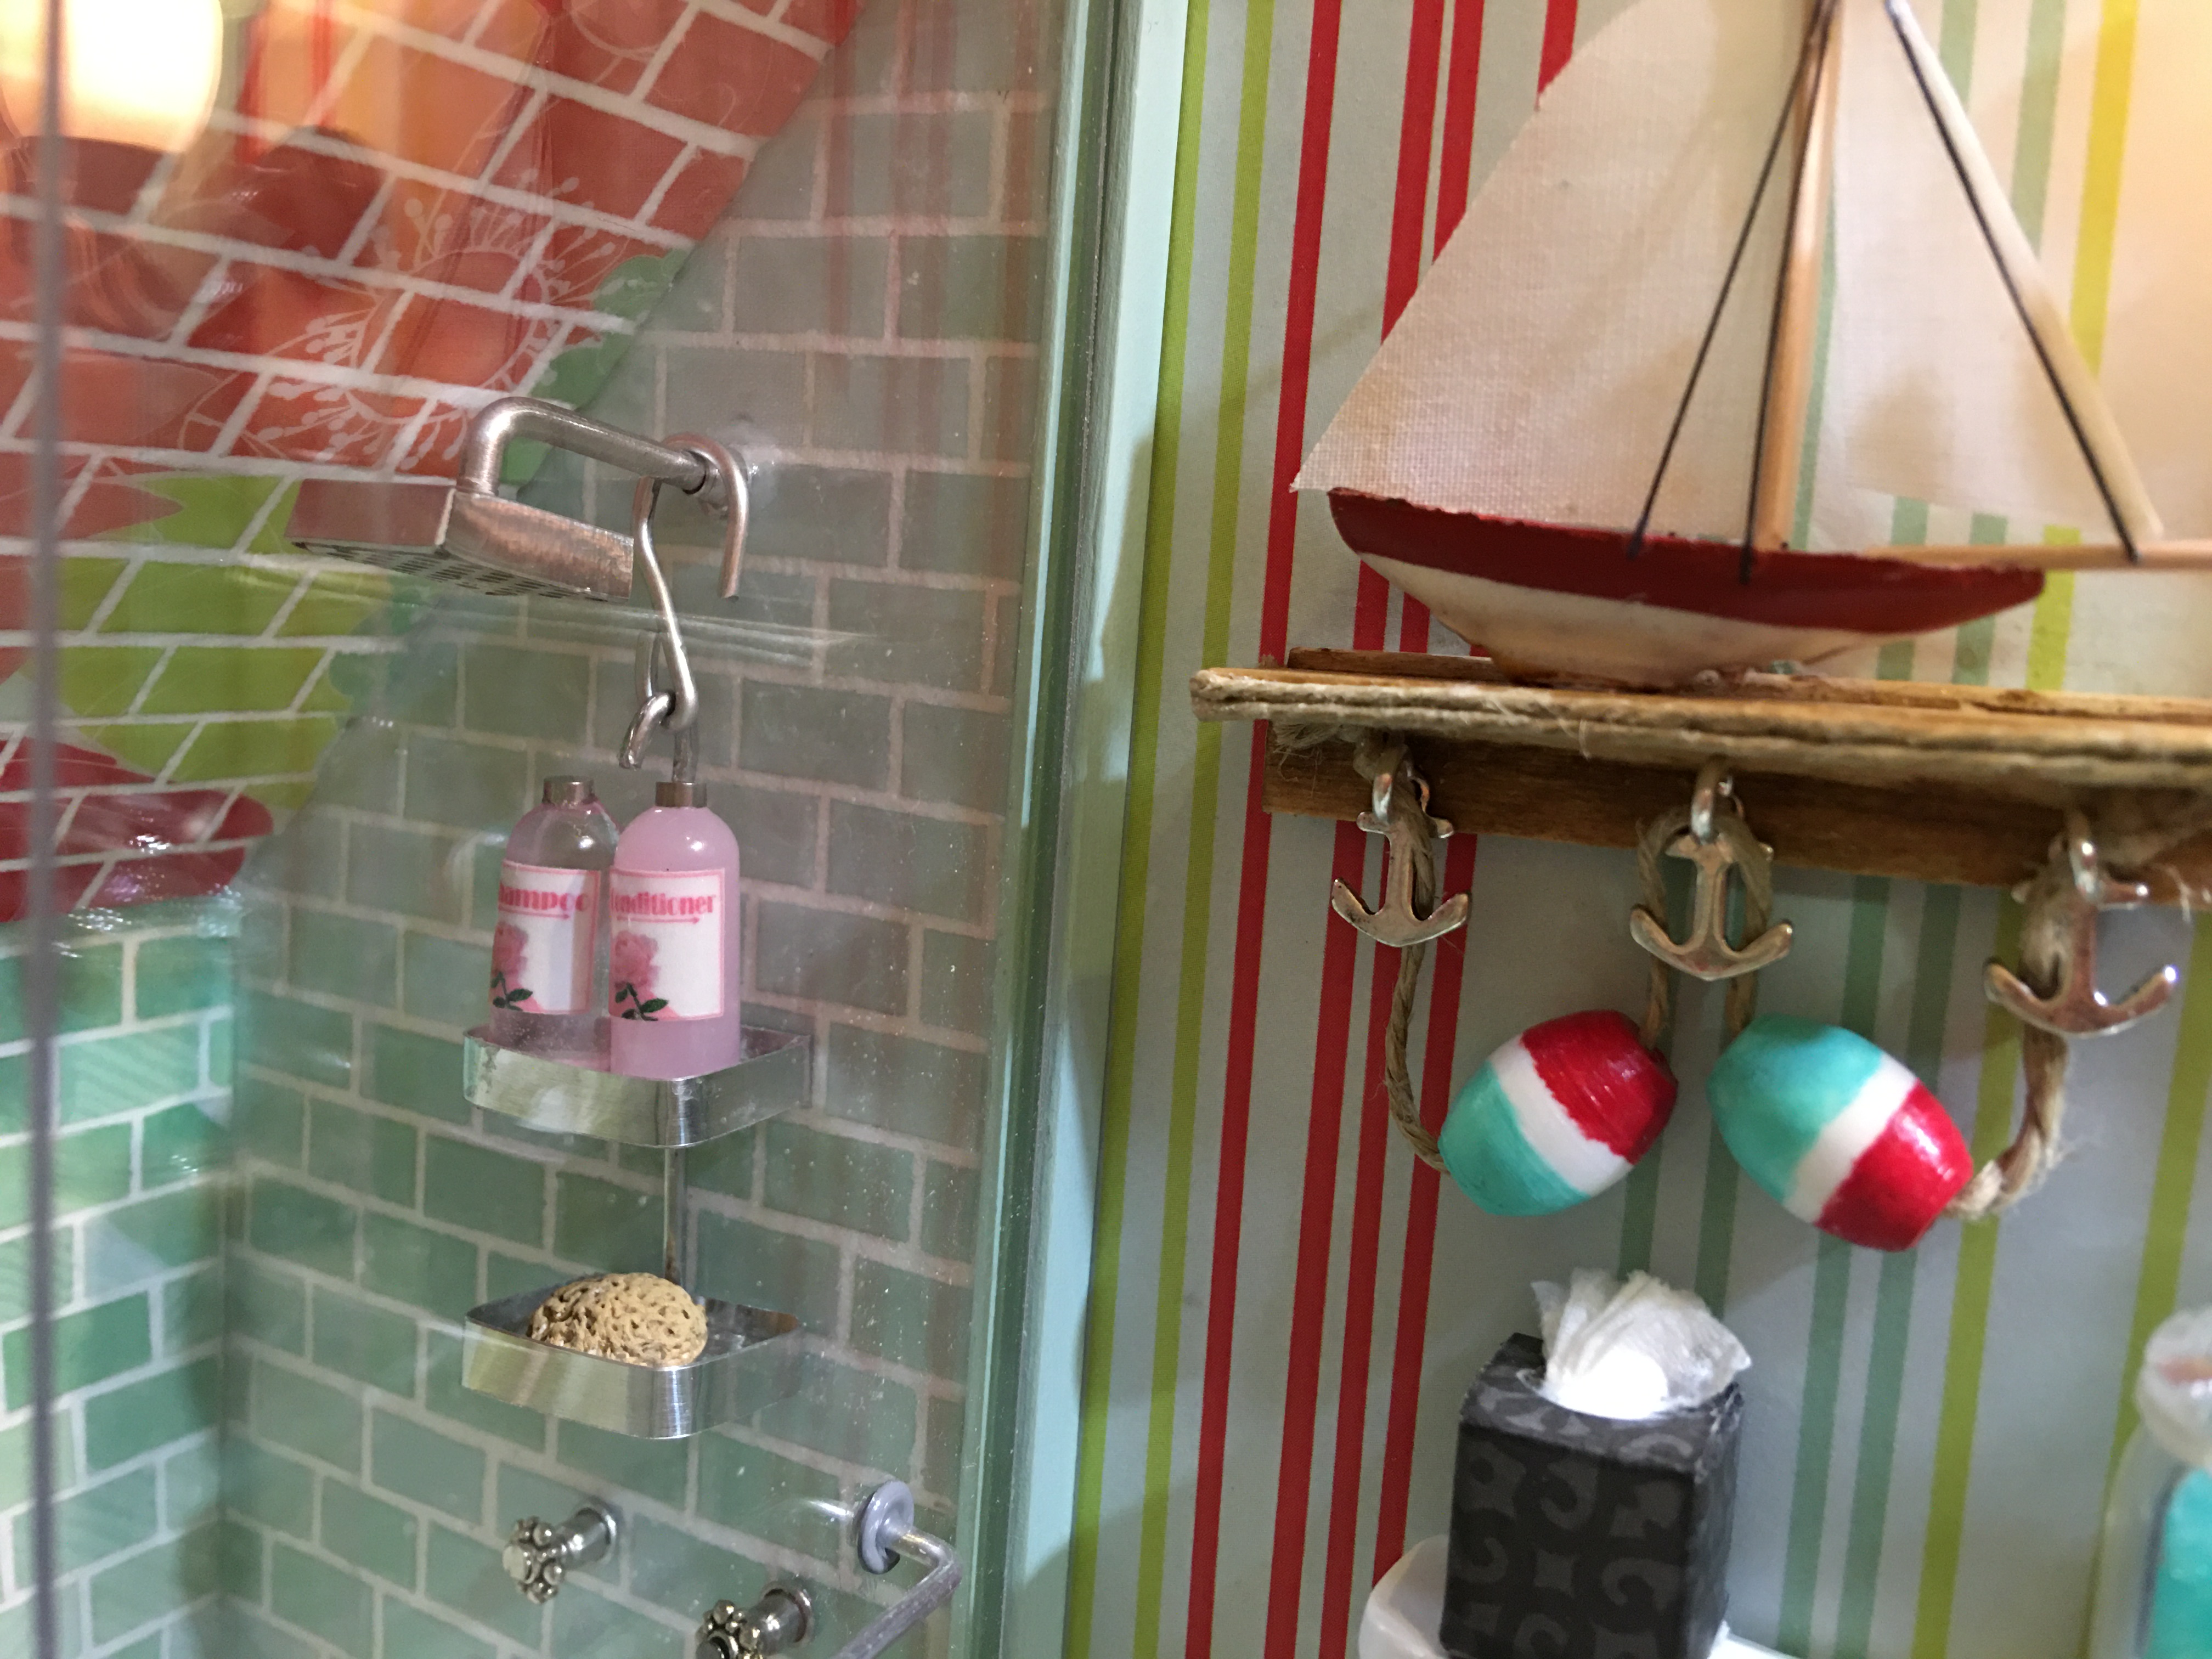
Now I could begin adding in the necessities and décor. I added hygiene items to the shower, a towel bar and towels (made from dollar store baby wash cloths), beachy wall plaques, hooks on the door, the vanity with filled baskets, soap jar, candle, hand lotion, a fancy shell, a mirror, a fan vent (on the ceiling) and a nautical shelf with a boat and buoys that I printed on the 3D printer.


The ensuite bathroom is officially open for business!

There is even a line to get in!
Before I go patting myself on the back too vigorously, I still have another bathroom to finish. And that one, being roughly 3" x 4" is a challenge! I'll need the help of my entire "machine park" and some clever thinking to pull it off!
Oh one last note - I had forgotten last week to show the utility side of the house and how I disguised the bedroom's lamp wire exiting through the wall. It's not completely hidden, but it looks like many real life houses do and that's okay with me. I just secured the wire with glue and then painted over it with the house color. If I want further camouflage, a climbing vine might work.

Here's to always having a bathroom in good working order when you need it!
xo xo,
Jodi